🐳 Docker Setup on AWS Ubuntu Server
Date: 2025-05-24
This guide walks you through setting up Docker on an AWS-hosted Ubuntu server, configuring it to run web services such as Apache2 inside a containerized environment. This setup is ideal for learning containerization, deploying isolated services, and practicing DevOps principles.
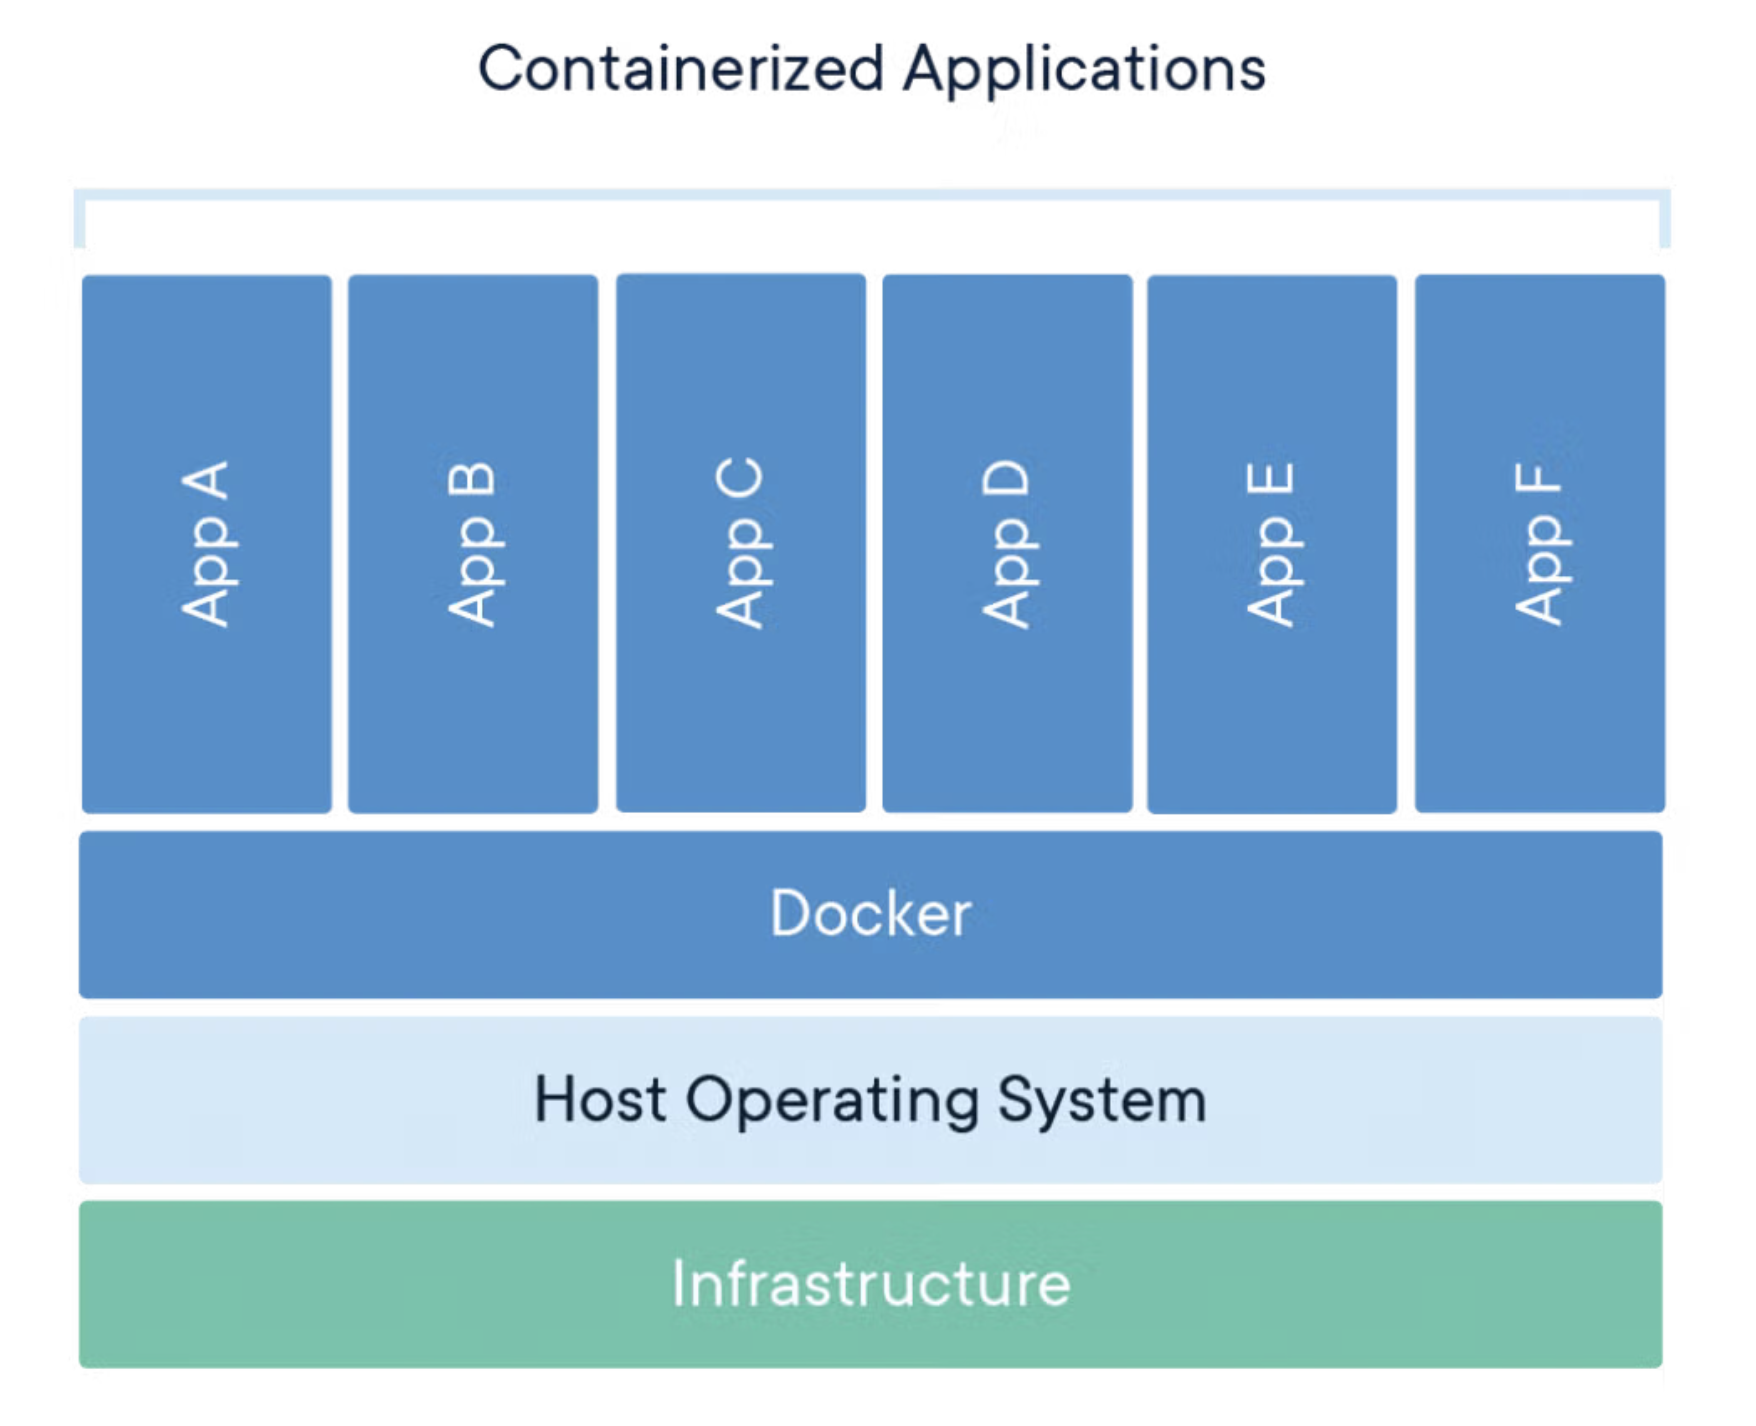
⚙️ Architecture Overview
The proposed architecture is as follows:
[AWS Ubuntu] → [Docker Container: Ubuntu] → [Apache2 Web Server]
This structure ensures your web server is encapsulated inside a container, isolated from the host system. It provides benefits like easier deployments, rollbacks, and consistent environments across machines.
🧱 Phase 1: Install Docker
Step 1: Update System and Install Dependencies
sudo apt update && sudo apt upgrade -y
sudo apt install apt-transport-https ca-certificates curl software-properties-common -y
Step 2: Add Docker’s Official GPG Key
curl -fsSL https://download.docker.com/linux/ubuntu/gpg | sudo gpg --dearmor -o /usr/share/keyrings/docker-archive-keyring.gpg
🔍 What This Command Does
✅ curl -fsSL https://download.docker.com/linux/ubuntu/gpg
curlis a command-line tool for transferring data from or to a server.- Flags:
-f: Fail silently (don't show error output if the download fails).-s: Silent mode (no progress bar or messages).-S: Shows errors if-sis used and something goes wrong.-L: Follows redirects.
- This command downloads Docker’s GPG public key.
✅ | sudo gpg --dearmor -o /usr/share/keyrings/docker-archive-keyring.gpg
- The pipe
|passes the downloaded GPG key directly into the next command. gpgis the GNU Privacy Guard tool for encryption and signing.--dearmorconverts the ASCII-armored GPG key into binary format.-o /usr/share/keyrings/docker-archive-keyring.gpgwrites the binary key to a secure location on the system.
🔒 Why This Is Important
This step ensures that your Ubuntu system can verify the authenticity of the Docker packages. The key acts like a digital signature. When Docker packages are installed, Ubuntu uses this key to verify that the packages were really created and signed by Docker and have not been tampered with.
Using the keyring stored in /usr/share/keyrings/ is a security best practice on modern Debian-based systems, helping to separate third-party GPG keys from the main trusted keyring.
Step 3: Set Up the Stable Repository
echo "deb [arch=$(dpkg --print-architecture) signed-by=/usr/share/keyrings/docker-archive-keyring.gpg] https://download.docker.com/linux/ubuntu $(lsb_release -cs) stable" | sudo tee /etc/apt/sources.list.d/docker.list > /dev/null
🧩 What each part does:
echo "...
Prints a line of text that defines a new APT repository source for Docker.arch=$(dpkg --print-architecture)
Dynamically inserts your system’s architecture (e.g.,amd64,arm64) into the repository line.signed-by=/usr/share/keyrings/docker-archive-keyring.gpg
Instructs APT to trust packages signed with Docker’s GPG key, which we added in the previous step.https://download.docker.com/linux/ubuntu
The URL for Docker's official package repository.$(lsb_release -cs)
Dynamically inserts the codename for your Ubuntu release (e.g.,jammy,focal), ensuring the right repository for your Ubuntu version is used.| sudo tee /etc/apt/sources.list.d/docker.list
Pipe the repository line into a new file in APT’ssources.list.ddirectory.> /dev/null
Suppresses the output fromteefor a cleaner terminal experience.
✅ Result
After this command, your system is configured to fetch Docker packages from Docker's official stable channel. This ensures you're getting production-ready, well-tested Docker software directly from the source.
Step 4: Install Docker Engine
sudo apt update
sudo apt install docker-ce docker-ce-cli containerd.io -y
Step 5: Enable and Start Docker
sudo systemctl enable docker
sudo systemctl start docker
You can verify the installation with:
docker --version
🐧 Phase 2: Run an Apache Web Server in Docker
Step 1: Pull the Apache Docker Image
sudo docker pull httpd
What this does:
This command downloads the latest official Apache HTTP Server Docker image (httpd) from Docker Hub. Docker Hub is the default public registry where Docker images are stored. By pulling the image, you're preparing your system to launch a container that runs Apache without installing Apache directly on the host.
sudo: Ensures the command runs with administrative privileges.docker pull: The command to download an image from a registry.httpd: The name of the Apache image (short for HTTP Daemon).
💡 Tip: You can specify a version tag (e.g., httpd:2.4) if you want a specific version. Otherwise, Docker pulls the latest version by default.
Step 2: Run Apache in a Container
sudo docker run -dit --name apache-server -p 80:80 httpd
What this does:
This command creates and runs a new Docker container from the httpd image. The container will run Apache and serve web traffic on port 80.
Breakdown of parameters:
sudo: Runs the command with superuser privileges.docker run: Tells Docker to create and start a new container.-d: Detached mode — runs the container in the background.-i: Interactive mode — keeps STDIN open (even if not attached).-t: Allocates a pseudo-TTY — useful for debugging or attaching to the container later.--name apache-server: Assigns a custom name to the container (easier to reference later).-p 80:80: Maps port 80 on your host machine to port 80 inside the container. This means when you accesshttp://your-server-ip, it hits the Apache server in the container.httpd: Specifies the image to use (same one you pulled in Step 1).
💡 Tip: After running this, you can check the running container using:
docker ps
📁 By default, this container serves files from /usr/local/apache2/htdocs. You can mount a local volume if you want to serve custom content.
📂 Phase 3: Serve Custom Web Content (Optional)
You can mount a directory with your website into the container:
sudo docker run -dit --name apache-server -p 80:80 -v /home/ubuntu/website/iPortfolio:/usr/local/apache2/htdocs/ httpd
Place your HTML files in /home/ubuntu/website on your server.
📤 Transfer .html File from Mac to AWS Ubuntu Server
This guide explains how to transfer a .html file from your Mac to an AWS EC2 Ubuntu server using the scp (secure copy) command.
🔧 Prerequisites
- AWS EC2 instance is running
- SSH access is configured (i.e., you can connect with a
.pemkey) - You know the public DNS/IP of the instance
📂 Navigate to the File Location
Open Terminal and navigate to the directory containing your .html file:
cd ~/Documents/AWS/docs
🚀 Transfer the File with scp
Use the following command:
scp -i /path/to/your-key.pem filename.html ubuntu@your-ec2-public-dns:/home/ubuntu/website

scp -i Janos-Ubuntu-Server-Key-Pair.pem AWS_EC2_Roadmap__Launching_Your_First_Ubuntu_Server.html ubuntu@18.175.229.73:/home/ubuntu/website
🗂 Transfer a Directory with scp
scp -i your-key.pem -r /local/path/to/directory ubuntu@your-ec2-ip:/remote/path/

scp -i Janos-Ubuntu-Server-Key-Pair.pem -r /Users/janosrostas/WebDev/html/iPortfolio ubuntu@18.175.229.73:/home/ubuntu/website
Explanation:
-rmeans recursive, so it copies the directory and everything inside it (all files and subdirectories).scp: Secure Copy command-i: Path to your private key filefilename.html: File to transferubuntu@...: Username and EC2 DNS/IP/home/ubuntu/: Target path on server
If using Docker for Apache, you’ll need to:
- Copy the file into a shared volume
- Or rebuild the container with the file included
🔍 Why Use Docker?
Docker ensures a clean, reproducible, and isolated environment. It's widely used in modern DevOps pipelines and scalable architectures. By containerizing your applications, you also reduce the "it works on my machine" problem.
This guide helps beginners get hands-on experience with Docker in a practical and cost-effective manner, especially when using the AWS free tier.
🧹 Cleanup (When Done)
To stop and remove the container:
sudo docker stop apache-server
sudo docker rm apache-server
To remove Docker:
sudo apt purge docker-ce docker-ce-cli containerd.io
✍️ Author
János Rostás & ChatGPT
ECE Student | Cloud Tinkerer | janosrostas.co.uk
 JanosRostas.co.uk JanosRostas.co.uk
|